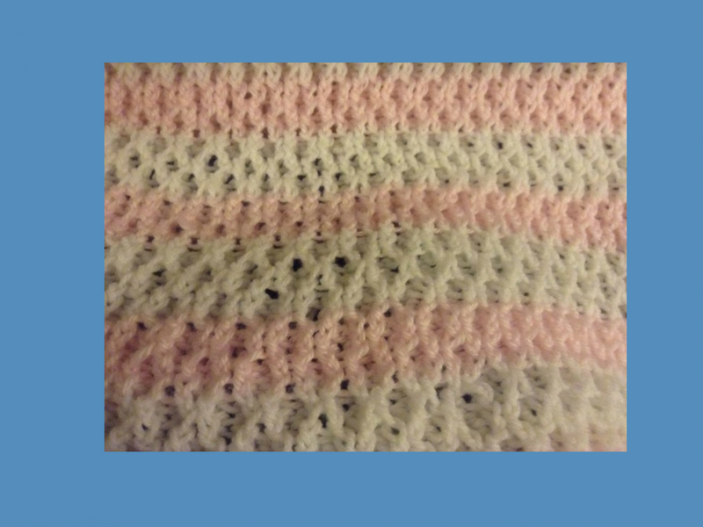
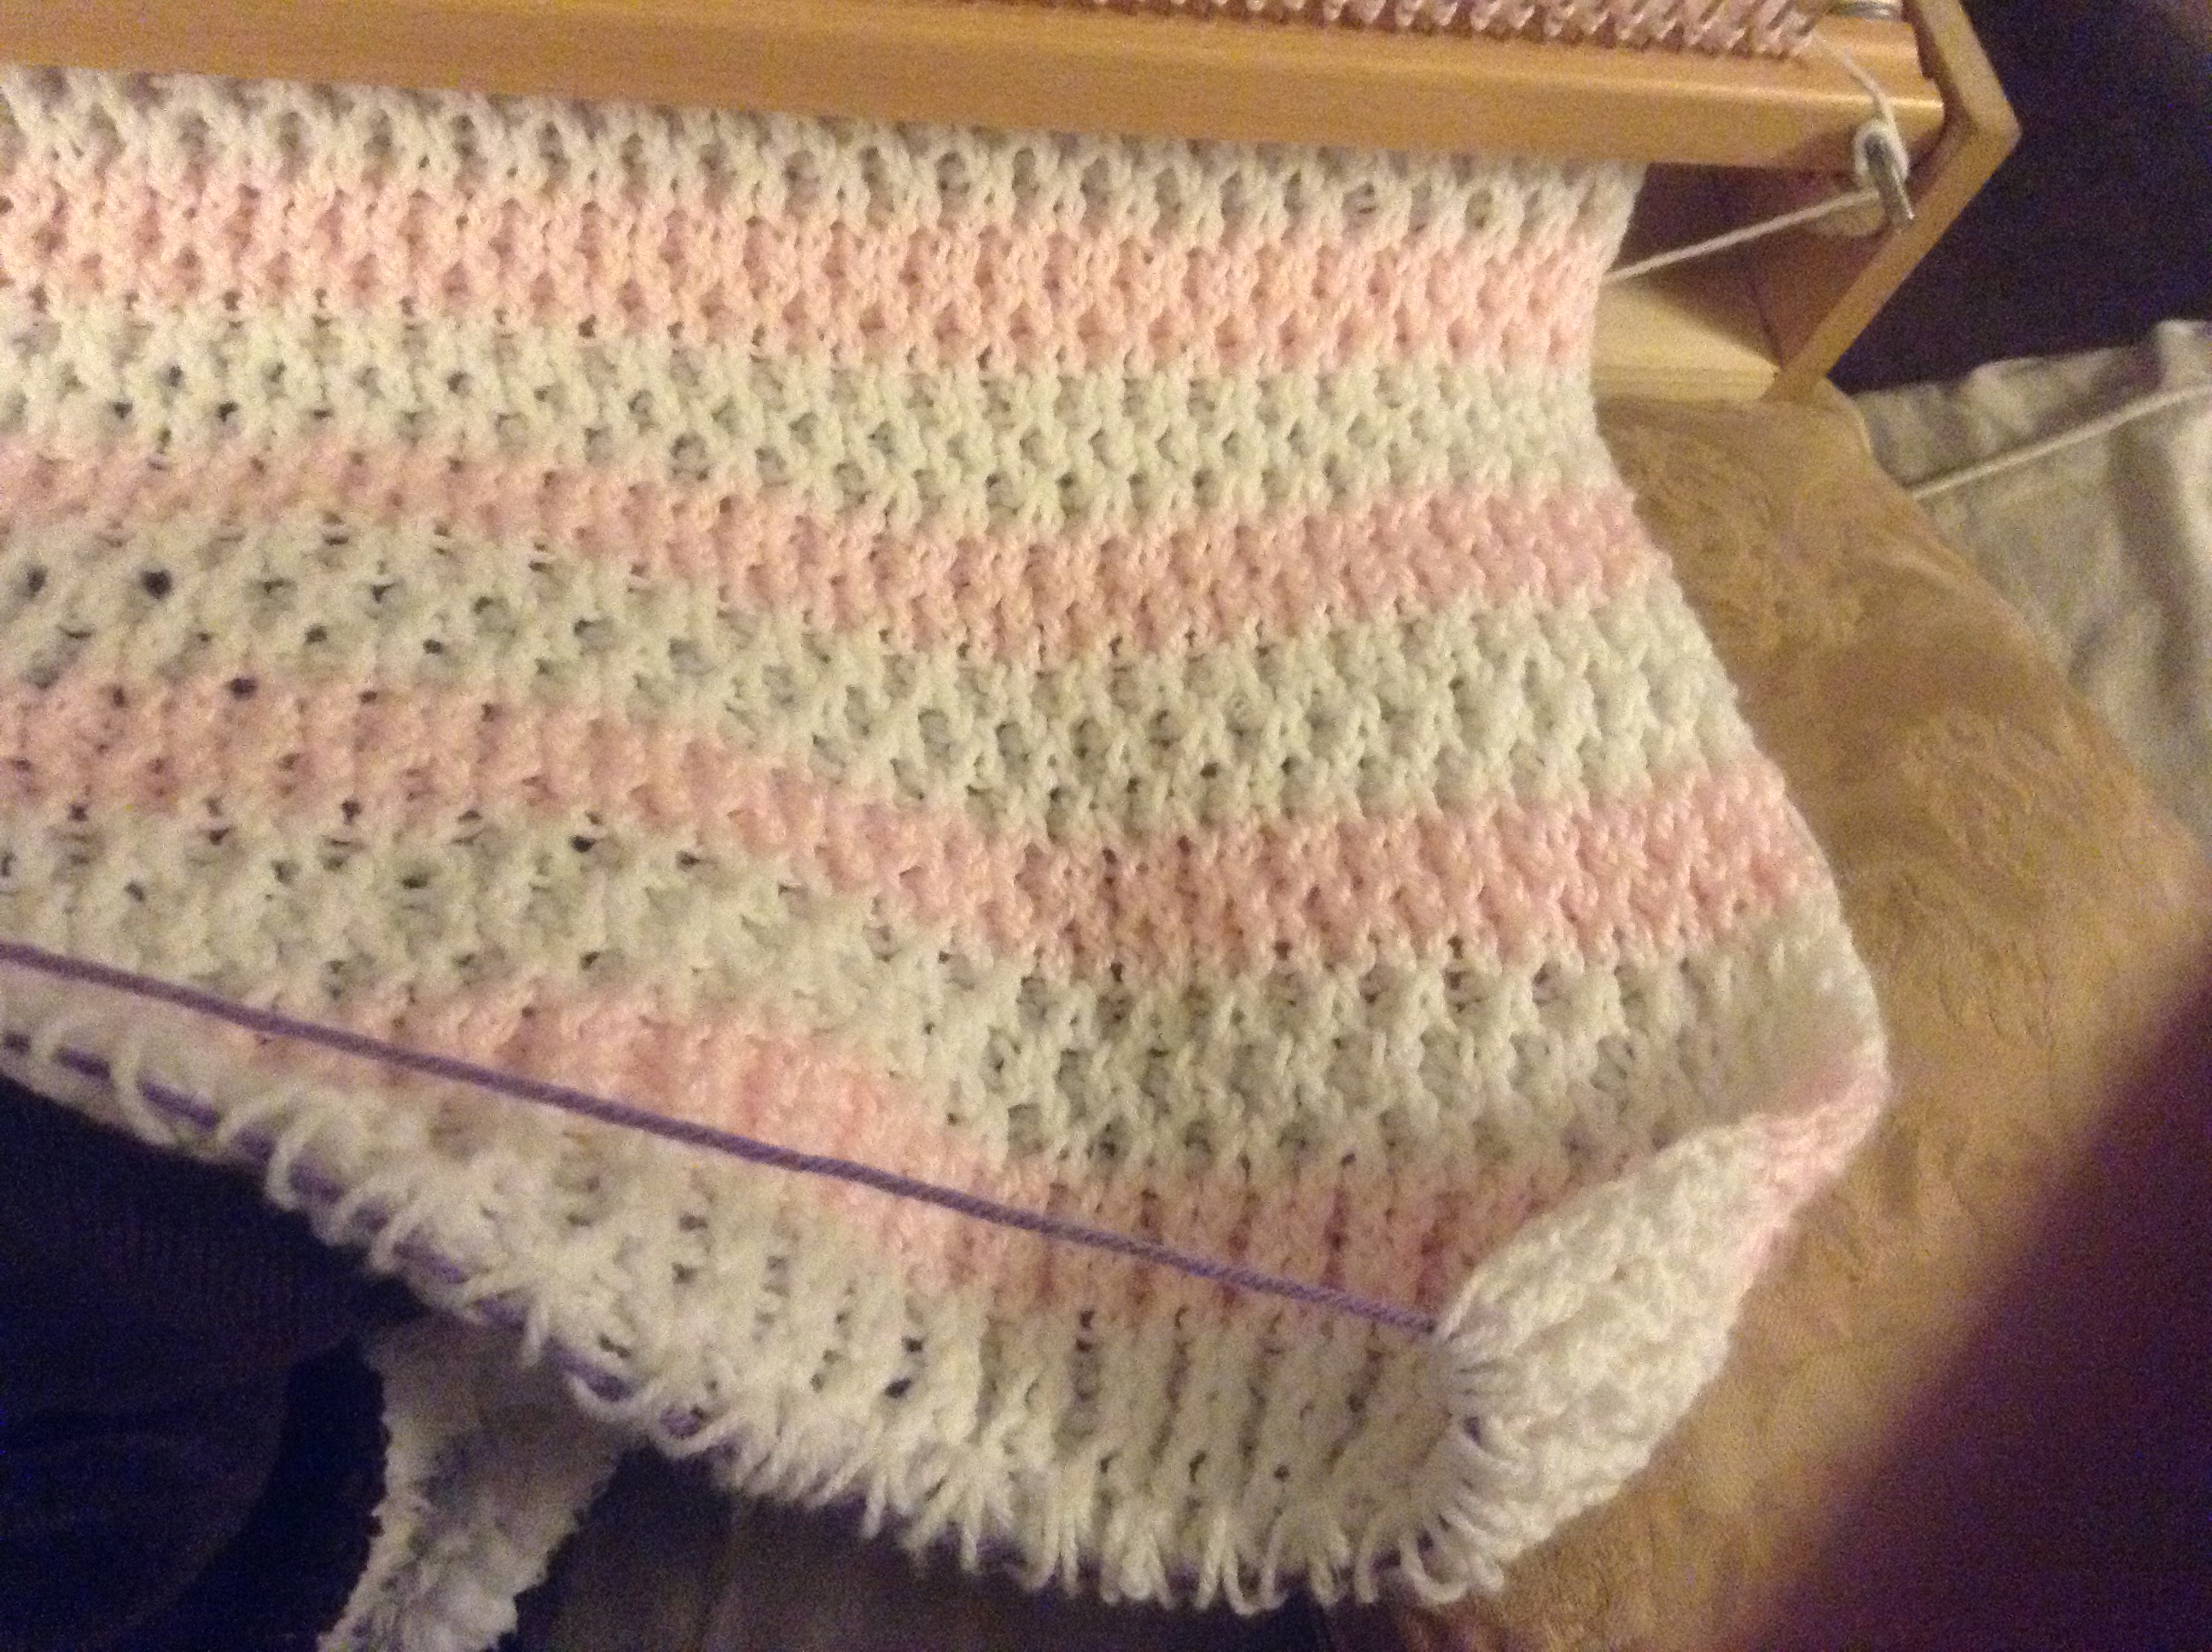
This is the basic pattern for the Honeycomb stitch. However, you can easily change the size of the “honeycomb” by increasing or decreasing the number for rows.
Below, we will use three rows to create a honeycomb. If you increase it to five rows, you get a larger, more oval “honeycomb”. Decrease it to two rows, you will get a smaller, rounder “honeycomb” which can be strikingly delicate when used with finer yarn, such as for baby items, baby blankets.
Here is a how-to video followed by written instructions:

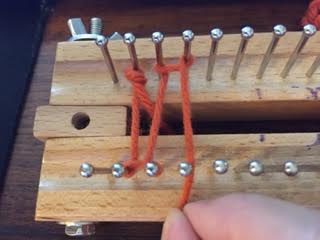
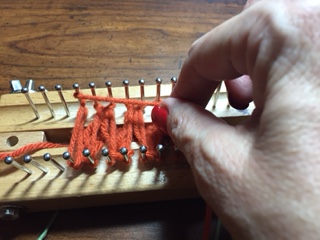
Working from left to right, cast on by tying a slip knot on the top pin (pin 1 Back). Bring yarn straight down to the inside of the pin below (pin 1 Front) and wrap around the outside of the pin.
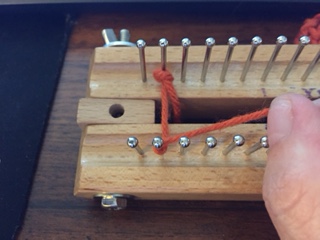
Bring the yarn to the next pin on the same side of the board (pin 2 Front) and wrap around the outside of that pin.

Bring yarn up to pin 2 Back, in between 2 Back and 3 Back.

Wrap around the outside of pin 2 Back and bring the yarn to the next pin on the same side of the board (pin 3 back) wrapping around the outside of that pin and continue down to pin 3 Front (between pins 3 and 4 Front).

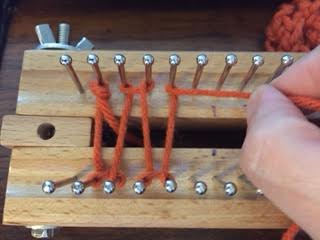
Continue back and forth in this fashion until you have completed the required width. On the last pin, wrap around the last peg again, then continue working backwards wrapping over the same pattern. You should now have two loops on each pin. Hook the bottom loop over the top loop on each pin. Continue until all pins have one loop left. You have now finished one row. Continue two more times.
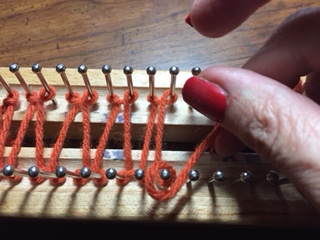
Once you have completed three rows, you will switch the pattern and start your wrap on pin 1 Front, bringing it to pin 1 Back, carrying it over to pin 2 Back and bringing down to pin 2 Front. You are basically doing the same pattern as before, only filling in the blanks that were left from the last pattern. Complete the rows using this new pattern three times.
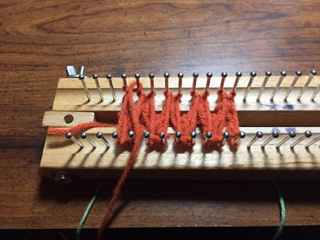
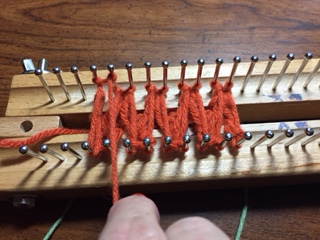
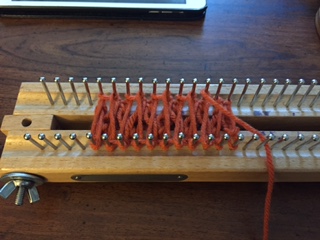
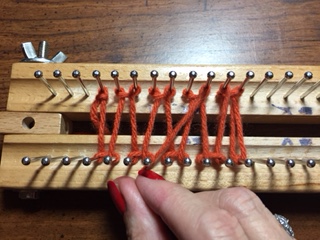
Once you have three rows with this new pattern, switch back to the first pattern and alternate. This creates the honeycomb pattern.


Karen Schmidt on
I came across this pattern by accident it is lovley. I have only done the figure 8 pattern ,would this be a challenge.I havnt picked any of my looms up for a year and i think it is time to start…Thankyou
Chris on
Can’t wait to see what you come up with!
Alechia Neathery on
I’m wondering how to bind off the double honeycomb stitch,you didn’t add that to the pattern . Please let me know,thanks
Chris on
Hi Alechia, you can bind off just like any other stitch. Here is my favorite way to bind off (with video): https://loomknitcentral.com/the-neater-way-to-bind-off.
Chris