
How do you decrease stitches when loom knitting the rib stitch? In order to keep the rib stitch pattern, we have to decrease a little differently. Here’s how.
Keep in mind, this same principle can be used whenever decreasing in a pattern stitch other than the Stockinette.
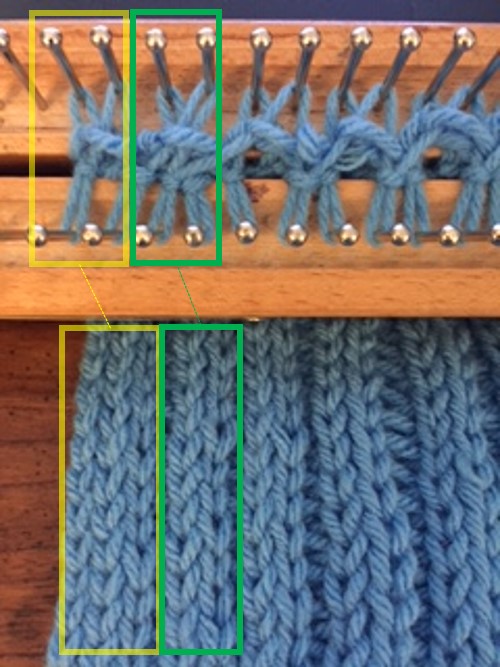
First, we need to determine which stitches create the pattern. In this case, the rib pattern is created in sets of two, as shown below:
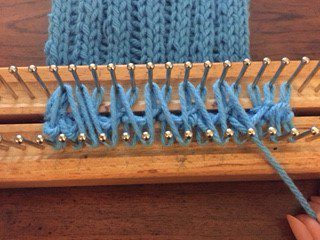
When decreasing, move one loop over to the next pin on the beginning (or end or both, as the pattern requires) of both the front and back board.

Next, wrap the row by wrapping pin 1b to 3f, back to 2b to 4f.

Then continue wrapping the rib stitch as normal.
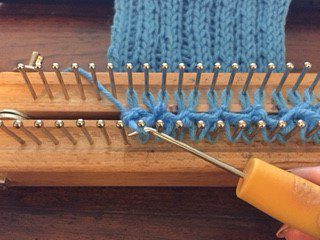
Once completely wrapped around, there will be 3 loops on pins 1f and 1b. Hook over the bottom 2 loops leaving one loop left on 1f and 1b. Continue hooking over the rest of the board as normal.

For the next row, move the end loop to the next pin on both the front and back board.
Wrap the rib stitch as normal (1b to 3f, 3b to 5f, etc.).

Hook over the bottom two loops on 1f and 1b and continue hooking over the rest as normal.
You’ve now decreased and kept the integrity of the pattern intact.


Comments