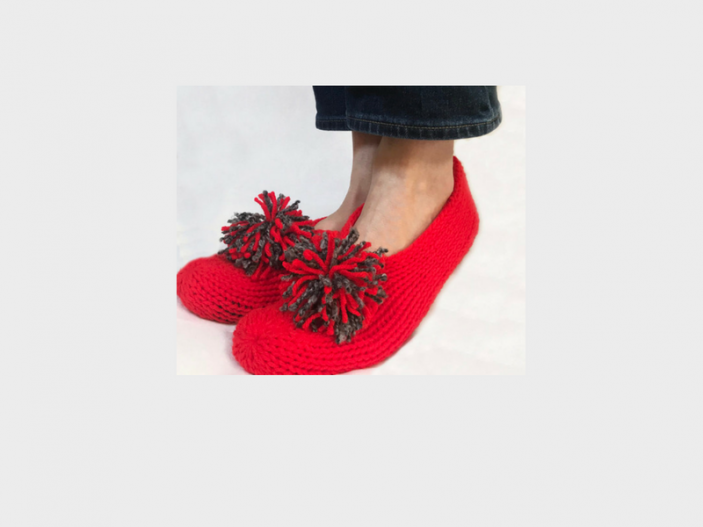
I was so happy to discover this slipper pattern on my favorite site, knittingboard.com. Not only easy but cleverly double-soled, as well. Check it out!
“Red Hot” Double Sole Slippers
By John Kreitzer
LOOM: 18” All-n-One Loom, set for double knit with 1cm spacers.
YARN: Red Heart Super Saver #4, 100% Acrylic, One Skein in color Hot Red. Machine wash and dry. Boucle dark grey yarn #5 used in Pompom, 10ft
Filler yarn for double sole of any color, Acrylic and washable, #6 or #7 for the power soles, approximately 20ft per slipper
STITCHES: Stockinette & basic increase
NOTIONS: Knit hook, Crochet hook, Darning Needle, 4 stitch markers (optional) or scrap yarn to mark center stitches
SIZE: Adult Medium (adjust for longer foot with additional rows; adjust for wider slipper with additional cast on stitches). This medium slipper is 11” long X 8.5” wide before sewing.
GAUGE: 7 Sts X 9 rows = 2 inches
INSTRUCTIONS
Start the slipper with the cast on at slipper toe.
Cast On 20 stitches in Stockinette. Lay anchor yarn of matching yarn in double strand. This will stay in the slipper when complete.
Rows 1 and 2: Work in Stockinette Stitch.
Row 3: Increase (1) stitch at 2nd peg and at peg #18. Work row in Stockinette.
Row 4 and 5: Work in Stockinette Stitch.
Row 6: Repeat row 3 with 2 additional increases, one at each end. You have a total of 24 stitches on the loom.
Row 7: Work row in Stockinette.
Lay the Filler Yarn across the stitches between the two rows of pegs.
Note: This is just like laying an anchor yarn but will only be placed on center 12 stitches. Lay the filler yarn at peg 3 between the rows of pegs. Place a stitch marker, or piece of contrast yarn between stitch 6 & 7 at each peg. This will mark the center stitches.
You will do your rows over the filler yarn, and the yarn will go from L to R, and then back R to L for each row on the center 12 stitches. Place stitch markers (or scrap of yarn) on pegs 6 from back end of loom on both pegs. The filler yarn will go back and forth across the stitches as you work and be locked in by the weaving and hooking of each row. On the 2nd row, you can fold back the filler yarn so that it covers only the center 12 stitches and the 6 stitches at each end are not covered by filler. After each row, pull the filler yarn snug. When hooking over each row, be sure to start on same side of loom for each row. This will be considered the front side of the loom. This will ensure that the outside of slipper is smooth with the filler yarn.
(white yarn used for clarity)
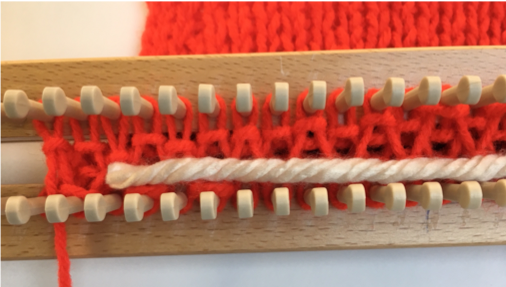

Lay filler ahead to peg 3. Weave in full circular. Hook over.
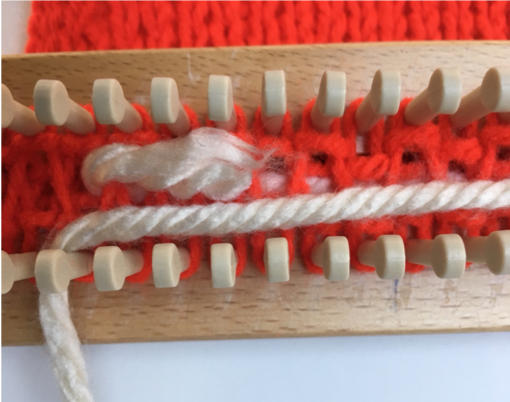
Row 2 with filler folded back. Ready to weave. Going back L to R for row 3.
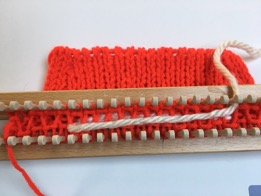
Row 8-40: Work in Stockinette with filler yarn on center 12 stitches. Cut filler yarn and weave the filler yarn tail into sole of slipper.
Rows 41-44: Work in Stockinette with red yarn only. Bind off with basic crochet bind off.
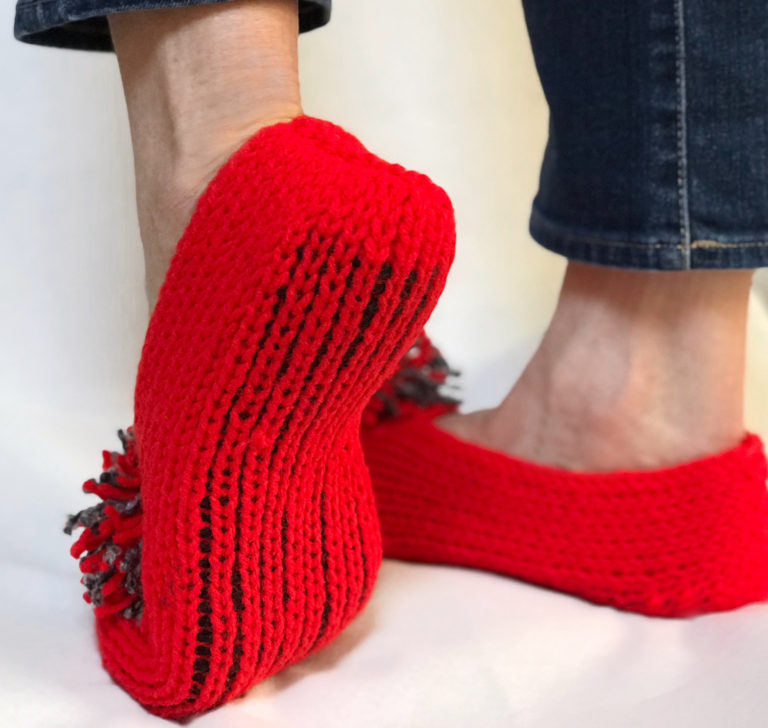
Sewing the Slipper: Once off the loom, fold the slipper lengthwise so that the anchor yarn is the toe. The side facing you is the inside of slipper. Using the red yarn and darning needle, sew up the back end or heel of slipper using invisible stitch. Knot securely. You can see the filler color yarn on inside and sole of slipper in photo. Yarn is black.
Draw the anchor yarn carefully and securely to create the toe. Knot the ends on inside of slipper. Trim the yarn tails and weave into the knit.
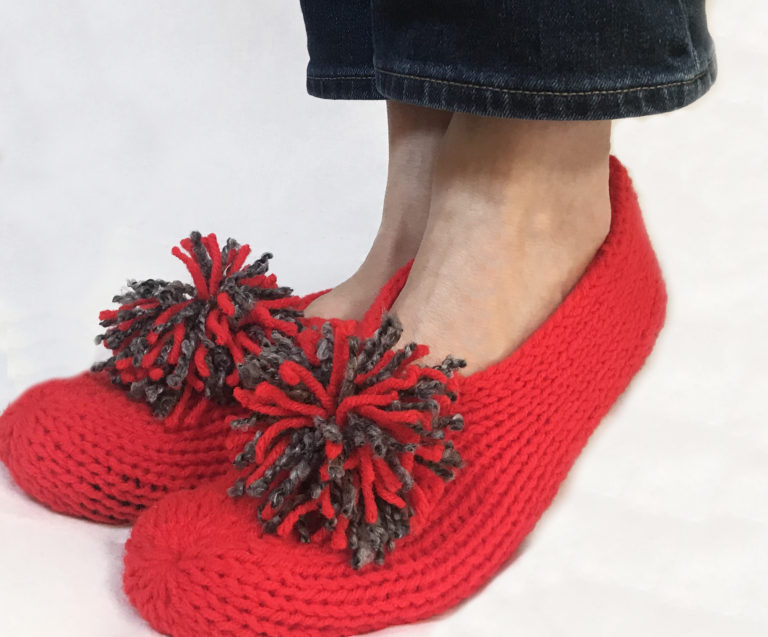
Pompom: Using one strand of red yarn and one strand of the Boucle yarn (4 ft each), wrap them together around a piece of cardboard to create a bow about 4” in diameter. Tie the bow securely with double strand of yarn leaving 3-4” yarn tails. Trim the pompom to desired size and sew to top of slipper with the yarn tails. Knot on inside of slipper and trim.
Make a 2nd slipper following same instructions.2
Happy Looming!

Comments