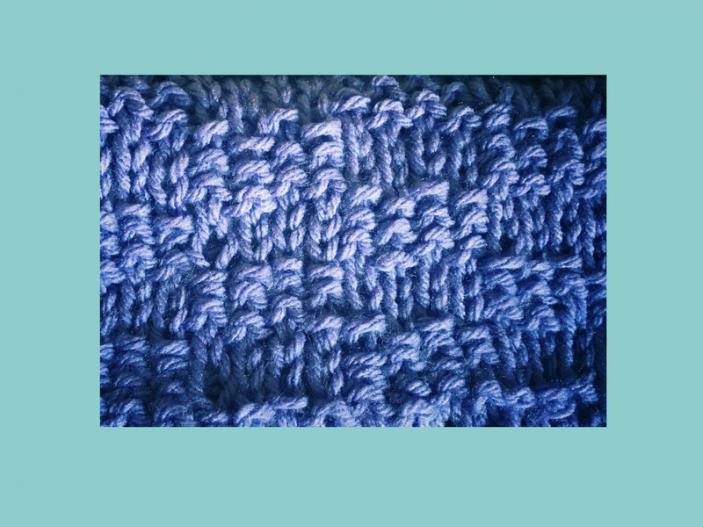
The purl stitch is a great way to create contrasting texture and designs in your project. You can do this on both sides of the board or just one side.
Since it does take a little more time to loom knit the purl stitch, I tend to purl on just one side of the board, leaving the other side Stockinette.
Wrap your first row using the Stockinette stitch. When wrapping the next row, to create the purl stitch, we will bring the yarn below the loop already on the peg.
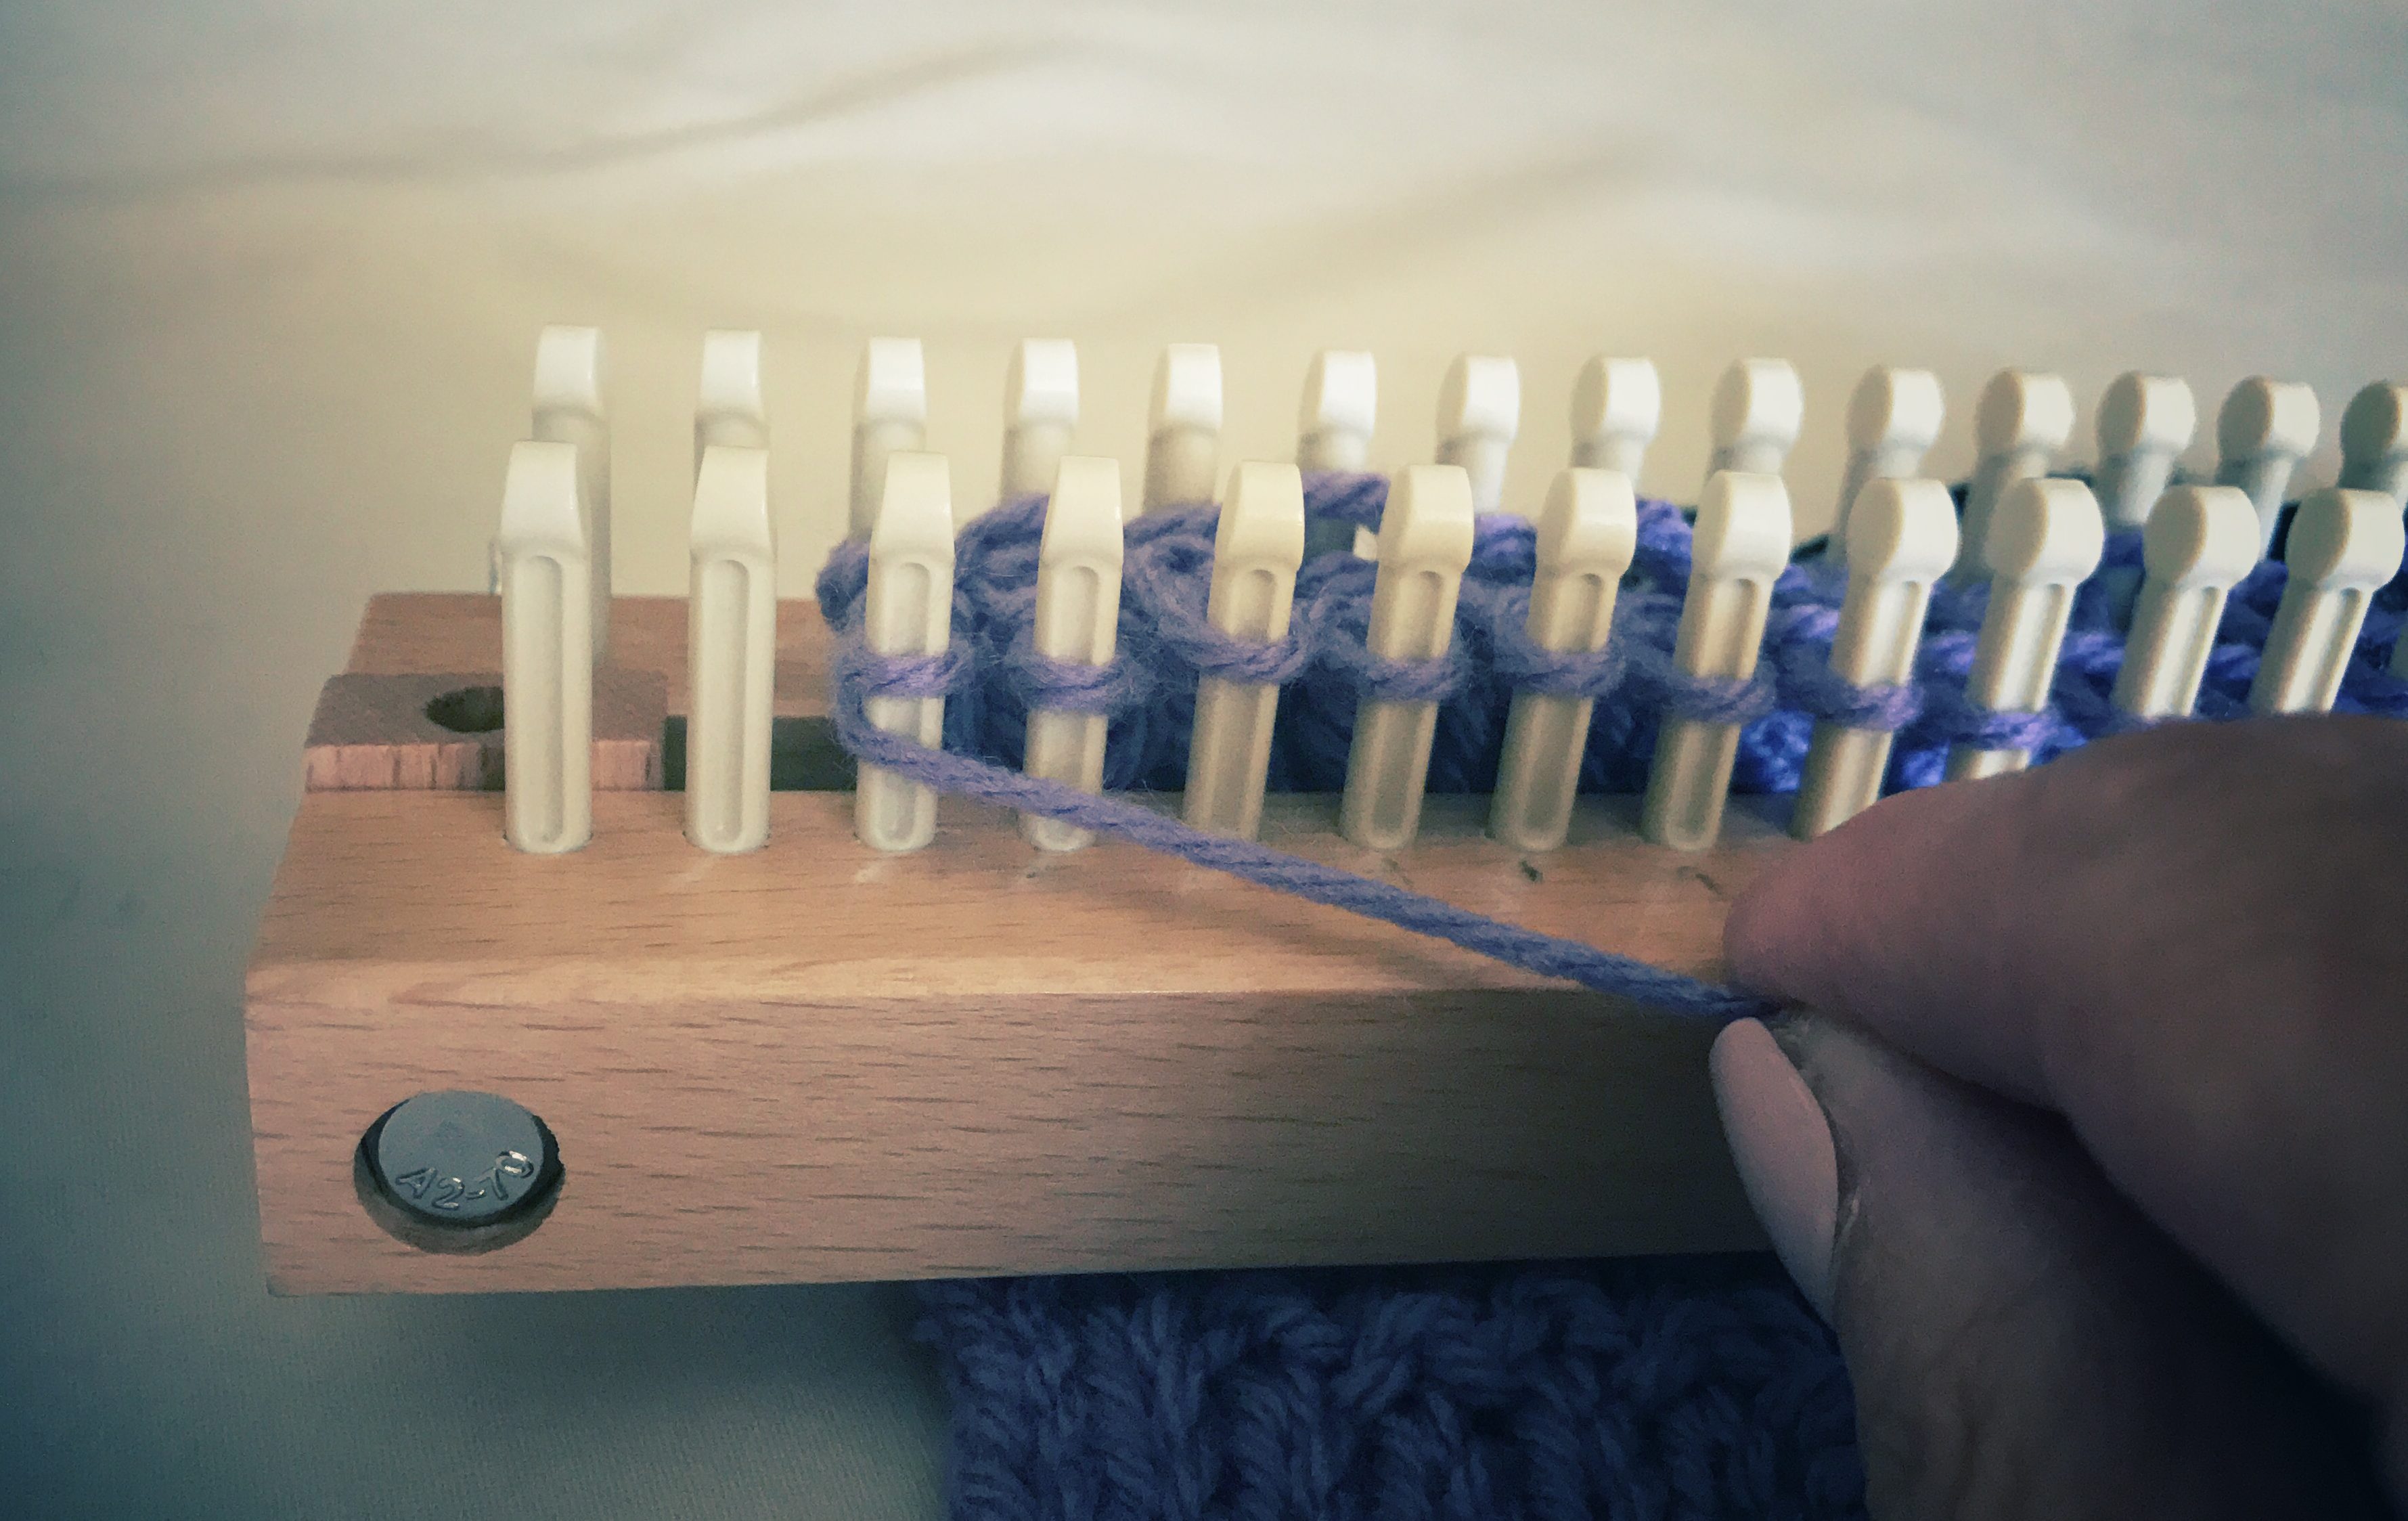
Once your stitches are wrapped, insert your hook into the top loop and pull the loop away from the peg a bit.

This will allow you to turn the tip of your hook towards the peg and scoop up the bottom loop.

Now pull both loops off the peg…

and return the loop from your hook onto the peg (use your finger to help get the loop back on the peg).

You now have completed a pearl stitch.

Mix and match: Combine your Stockinette stitches and your purl stitches to create a pattern on your work. Instead of changing colors, try the purl stitch!


Claudia on
Thank you for your great explanation of how to purl in double knitting. I wonder how do you wrap the loom before you start purling.
Chris on
Hi Claudia,
You wrap it using the Stockinette stitch. When you come to purling, you will then wrap the yarn below the loop on the peg, instead of above like you would with the Stockinette stitch.
Chris
Claudia on
Thank you, Chris.
Tracy O. on
Thank you sooooo much! I have been trying to figure this out for days – looking at pictures in all my books and just couldn’t get it till now. 🙂