Double-Knit looming makes it so easy to add color motifs. Have you ever wanted to add a border or motif to your project but not quite sure how to wrap your loom? Here are three motifs with wrap instructions and photos for each. Have fun creating!
Add motifs at the beginning and end of your project or pepper them throughout. They add color and charm to any project and really show off what you can do!
Things to keep in mind:
-
- We always work from the bottom up of the graph.
-
- Although we normally don’t have to block our work when double-knit looming, the work tends to pull in on the sides of the colorwork. Because of that, you may need to block the project, at least in that area.
-
- I call these borders but, really, you can add them anywhere in your project. However, no matter what type of stitch you are using for your project, when you want to add borders or motifs such as these, you will want to switch to the Stockinette stitch while completing your border/motifs.
Adding Color Yarn
Before we start, let’s look at how to add your 2nd color yarn to your work. Take your 2nd color and create a loop. Using a crochet hook, pull the loop under yarn in center of your work, near the pin you wll begin to wrap with your 2nd color:
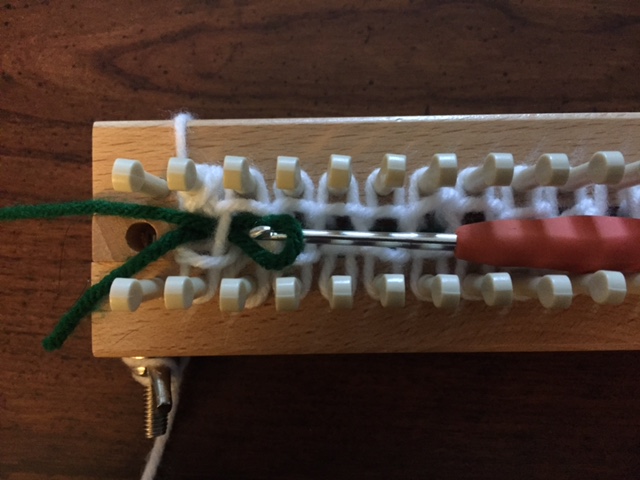
Pull the tail yarn through the loop on your crochet hook.
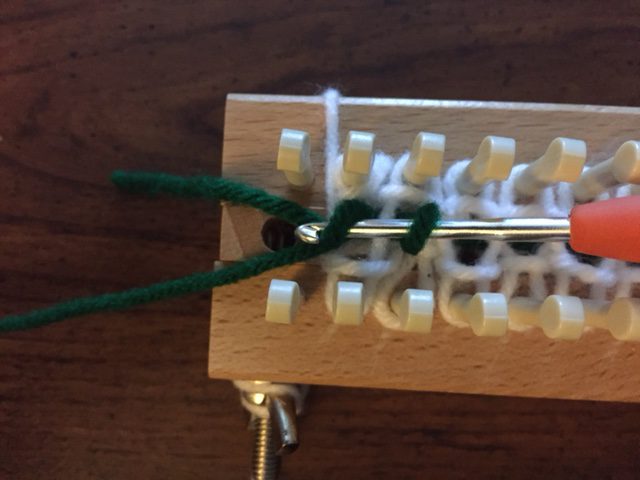
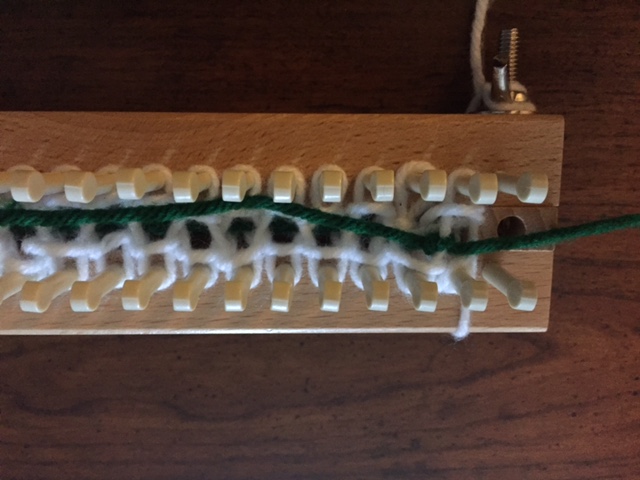
Now you are ready to wrap your 2nd piece of yarn (with the tail hidden).
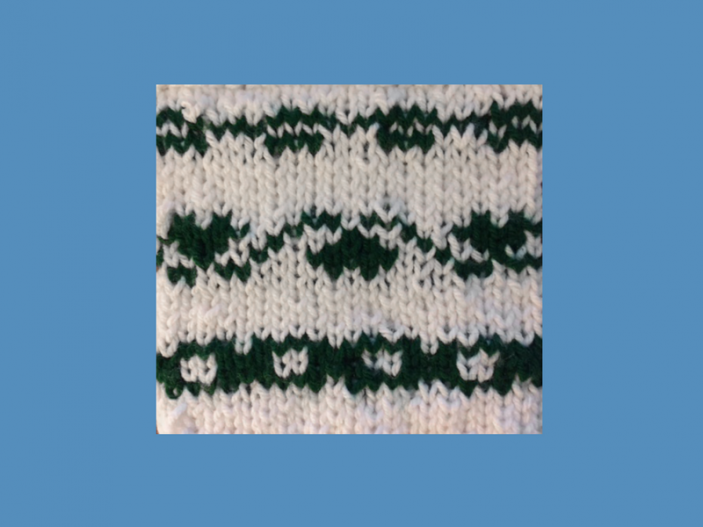
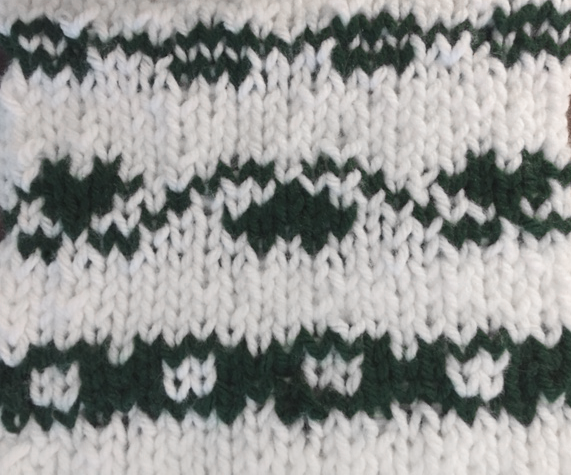
Motifs
Let’s look at how to create these three motifs: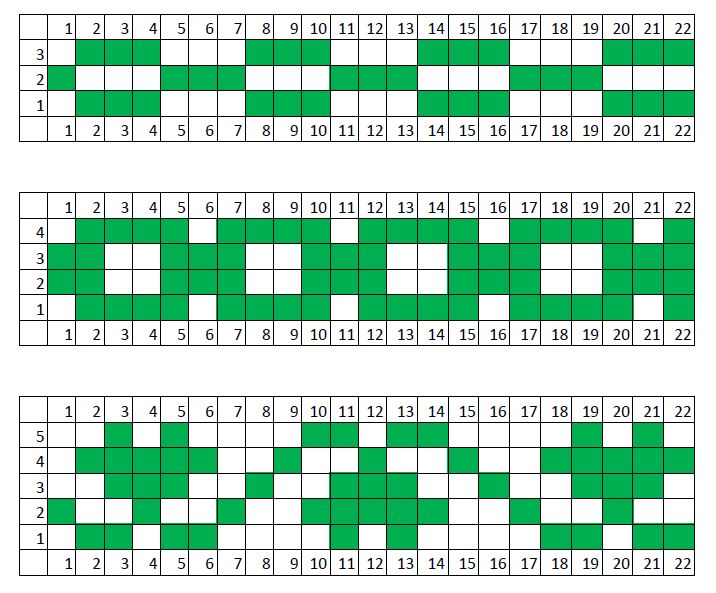 (You can download a pdf of the above here.)
Remember, we work any patterned colorwork in the Stockinette stitch.
In this example, following the pattern, starting with Row 1, each green square equals green stitch, each white square is white stitch.
Motif 1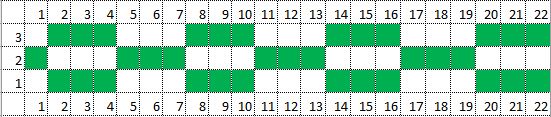
Row 1
Starting with green yarn, you will wrap 2 back to 3 front to 4 back, skip 5, 6, 7 and wrap 8 front to 9 back to 10 front, continuing in this manner until the end. Turn your board and complete wrapping of green yarn as shown.
First pass of green yarn: →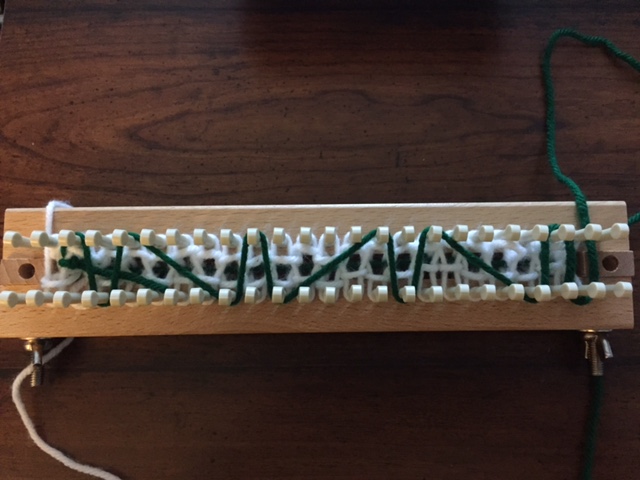
Return pass of green yarn: ←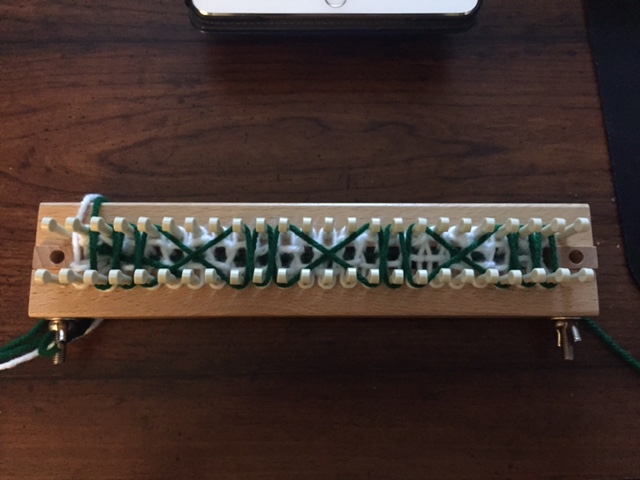
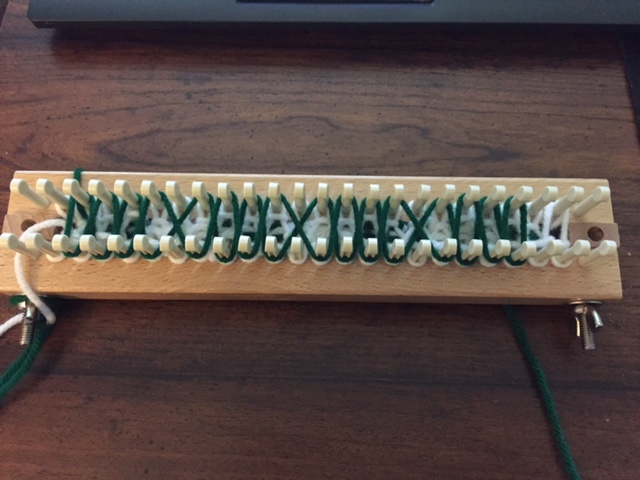
Both passes of white yarn (fill in the blanks): ↔
Hook Over.
Row 2
Both passes of green yarn then return: ↔
Both passes of white yarn (fill in the blanks): ↔
Hook over.
Row 3 – Repeat Row 1
Voila!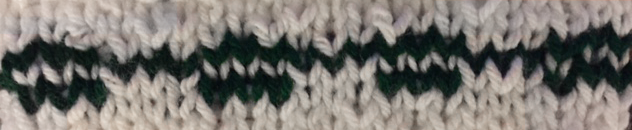
Motif 2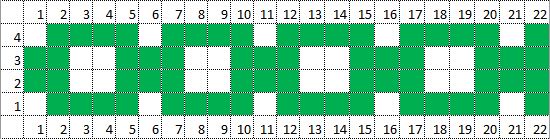
Row 1
First pass of green yarn: →
Return pass of green yarn: ←
Both passes of white yarn (fill in the blanks): ↔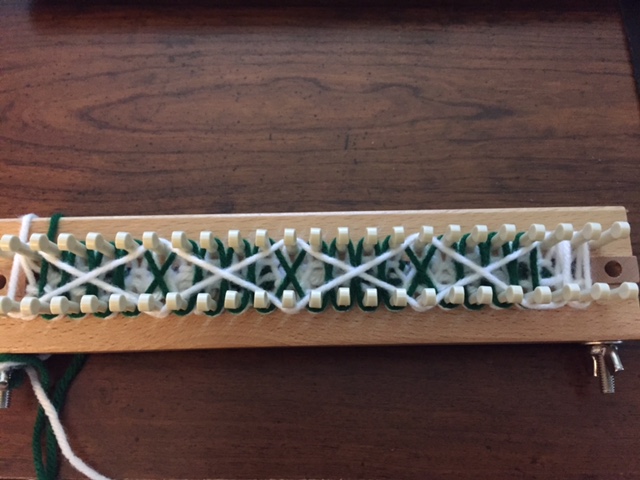
Hook over.
Row 2
Both passes of green yarn then return: ↔ Both passes of white yarn (fill in the blanks): ↔
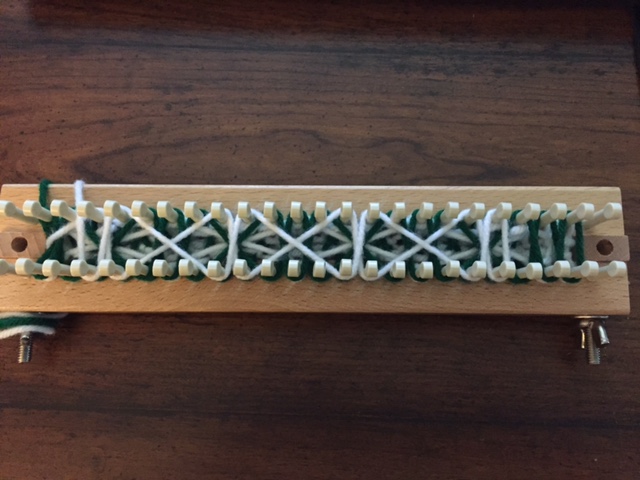
Hook over.
Row 3 – Repeat Row 2
Row 4 – Repeat Row 1
Voila!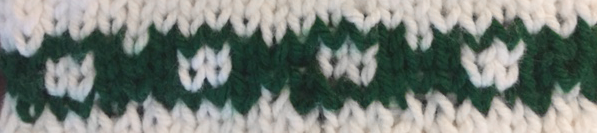
Motif 3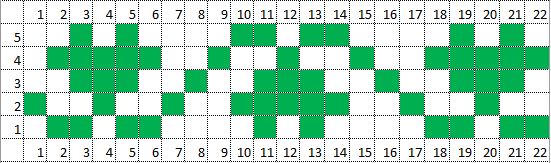
Row 1
First pass of green yarn: →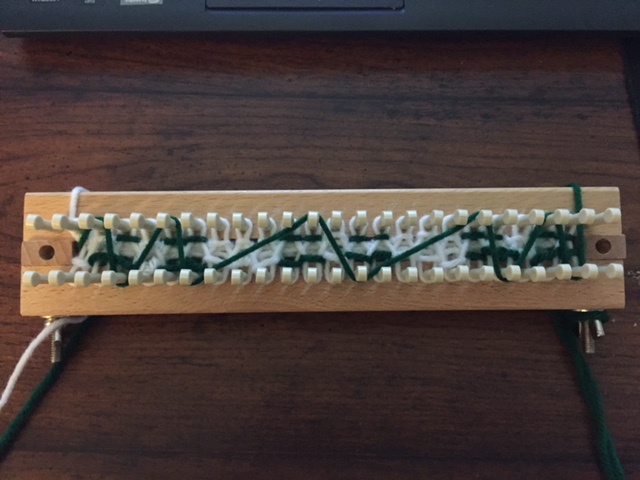
Return pass of green yarn: ←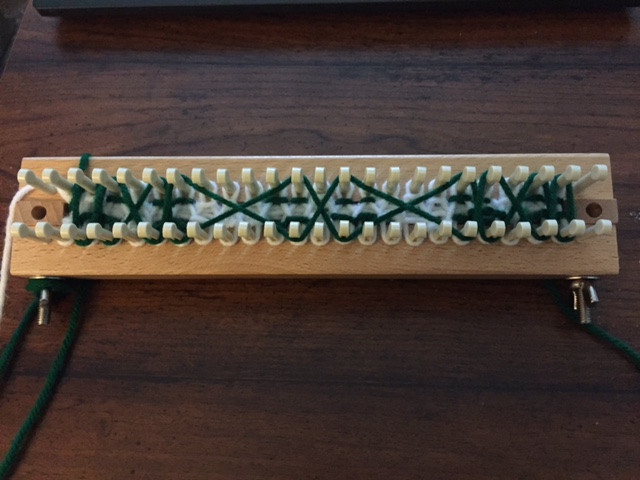
Both passes of white yarn (fill in the blanks): ↔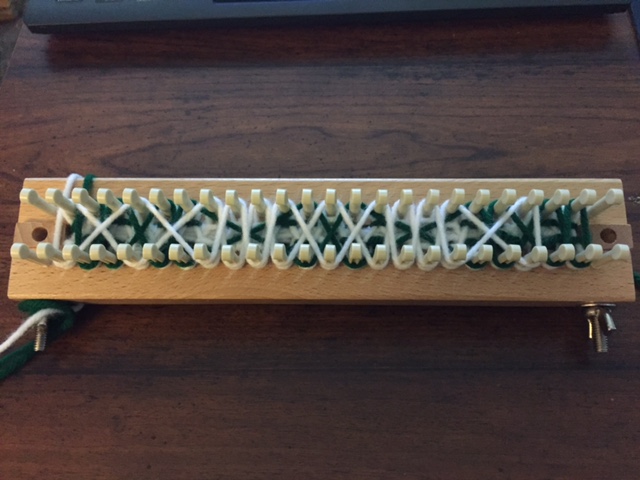
Hook over.
Row 2
First pass of green yarn: →
Return pass of green: ←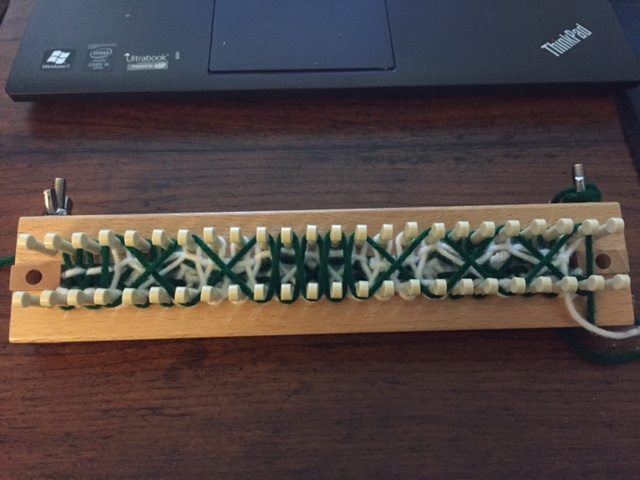
Both passes of white yarn (fill in the blanks). ↔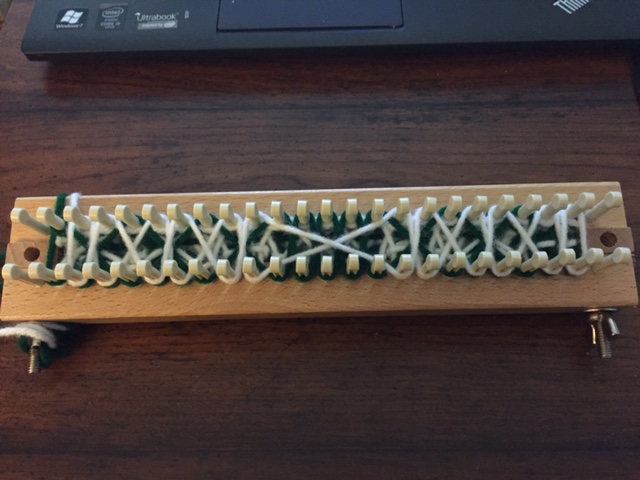
Hook over.
Row 3
Both passes of green yarn: ↔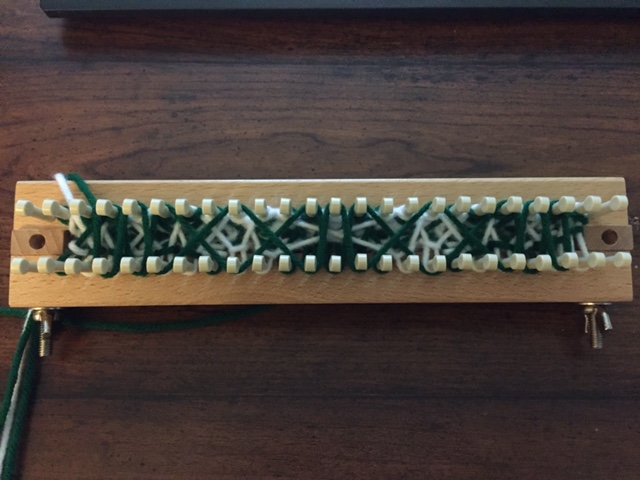
Both passes of white yarn (fill in the blanks): ↔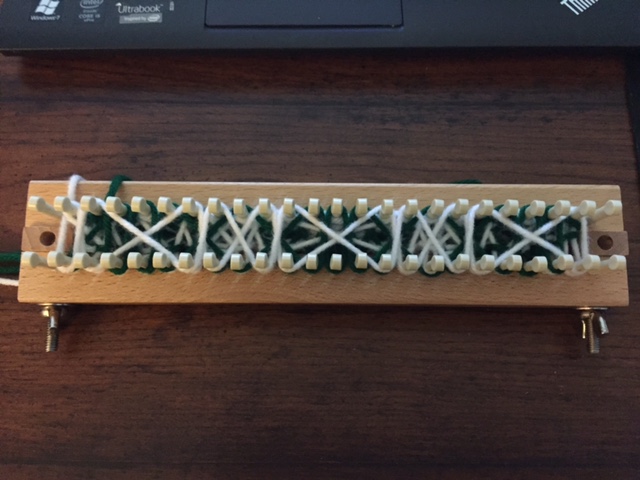
Hook over.
Row 4
Both passes of green yarn: ↔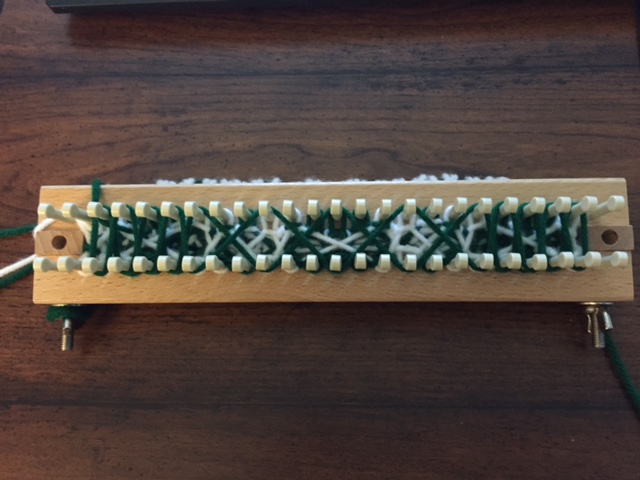
Both passes of white yarn (fill in the blanks): ↔
Hook over.
Row 5
Both passes of green yarn: ↔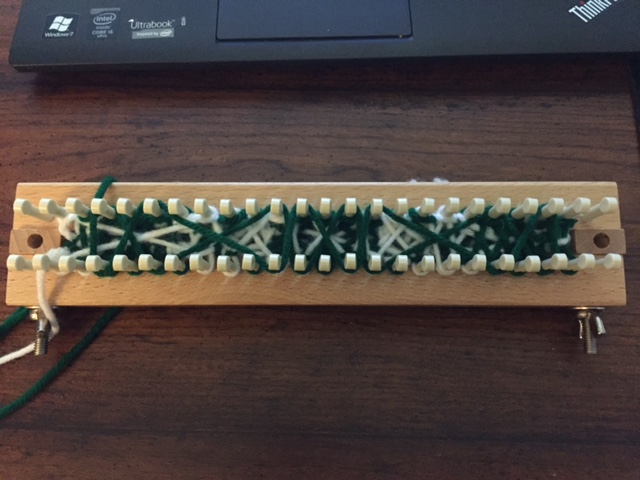
Both passes of white yarn (fill in the blanks): ↔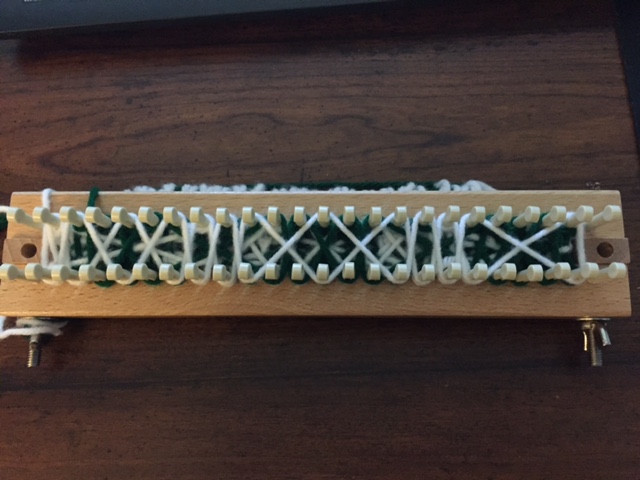
Voila!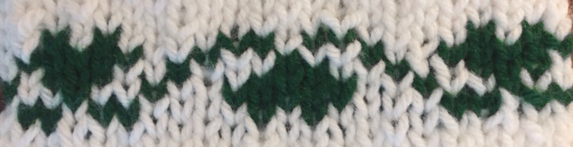
Now, this just gives you an idea of how to create 2-color motifs. Switching up the yarn type, colors, project type, really opens up your creative possibilities. So what are you waiting? Get Creative!


Comments